VATA Care and Cleaning Best Practices
Ever find yourself asking, “How do I clean that?” We’ve got answers!
Whether you’re dealing with adhesive residue or a blood reservoir bag in need of a saline flush, we’ve got simple solutions to keep your VATA models in tip-top shape.
And here’s some more good news! You probably already have many—if not all—of these cleaning essentials at home!
Our Materials
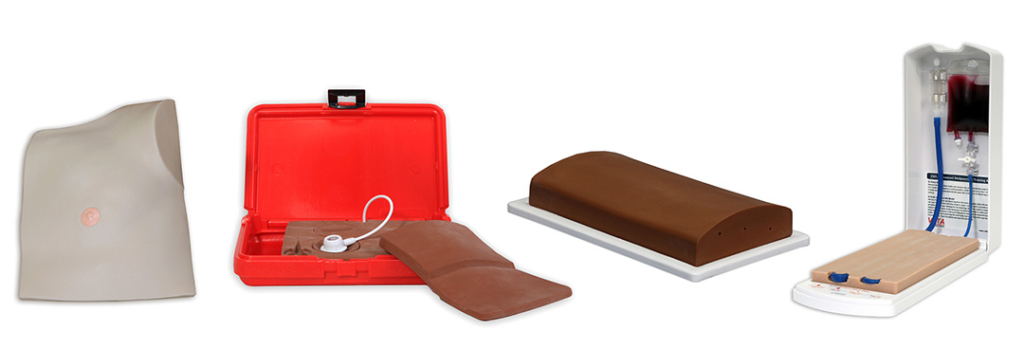
We have taken great care–and have dedicated countless hours of R&D—to achieve the realistic look and feel of our VATA models and trainers. Before diving into product care and cleaning, here’s a quick overview of the key materials used across our product line:
- A rigid, fiber-glass material (Chester Chest’s body and arm)
- A soft, tissue-like material (Chester Chest’s Outer Tissue Flap and Inserts)
- A specially formulated, tissue-like Dermalike II™ material (used across all of our ultrasound models and accessories)
- A firmer, tissue-like material that allows dressings to stick with ease (used across the majority of our wound care models including Seymour, Wilma, Vinnie, Pat, and Annie)
Care and Cleaning
While our care instructions are generally consistent across materials, please be aware of some slight variations. Exercise caution not to use auto wax on the soft, tissue-like material employed for Chester’s flap, inserts, or on the ultrasound models. Auto wax should exclusively be used to buff and reseal the rigid, fiber-glass material constituting Chester Chest’s body and arm. Whether you have a light or dark-pigmented model, the care instructions remain the same.

For Chester Chest’s Body and Arm
(2400/2402, 2410/2412)
- Always remove dressings after use and before cleaning or storing.
- Use soap and water or isopropyl alcohol for light cleaning.
- For adhesive buildup, use Goo Gone or a similar adhesive remover, following these steps:
- Soak a paper towel/towel with Goo Gone.
- Place the towel on the adhesive for 5+ minutes.
- Rub clean and repeat until all adhesive is removed.
- Clean the area with isopropyl alcohol to remove any oily residue.
- If dressing/bandages are sticking too aggressively, apply a light layer of general-purpose auto wax to the body and arm ONLY:
- Be careful not to apply any to the chest tissue flap.
- Buff it on to reseal the surface, wipe clean, and repeat as needed.
- Follow with an alcohol wipe and let it dry completely before storing.
For our Ultrasound Models, Venipuncture Training Aids, Port Body in a Box, Basic IO and Chester Chest’s Outer Tissue Flap
(705/706, 707/708, 711/712, 713/714, 1352/1353, 1354/1355, 2365/2366, 5010/5011, 4005/4006, 404/405)
- Use soap and water for light cleaning.
- For stubborn dirt buildup, use isopropyl alcohol.
- Once the model is dry, apply baby powder and wipe off excess.
- Note: If you don’t have baby powder or ran out, cornstarch is another great option!
- Ensure the model has dried completely before storing.
- Note: Do not expose these models to temperatures above 100 degrees F.
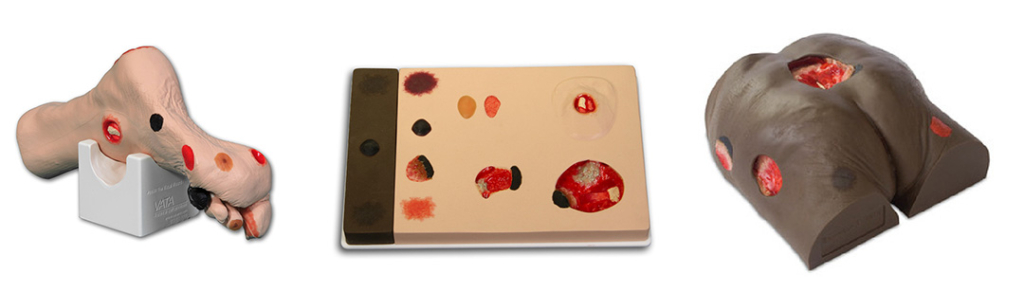
Wound Care Models
(910/920, 950/955, 270/275, 970/975, 230, 550, 555, 980, 3300/3301, 3302/3303, 3304/3305)
- Always remove dressings after use and before cleaning or storing.
- Use soap and water or isopropyl alcohol for light cleaning.
- For adhesive buildup, use Goo Gone or a similar adhesive remover, following these steps:
- Soak a paper towel/towel with Goo Gone.
- Place the towel on the adhesive for 5+ minutes.
- Rub clean and repeat until all adhesive is removed.
- Clean the area with isopropyl alcohol to remove any oily residue.
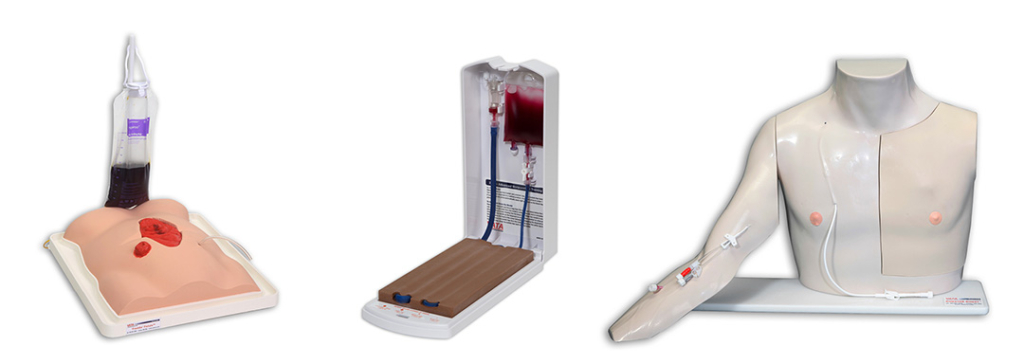
For Models with Fluid
(2400/2402, 2410/2412, 2365/2366, 600, 230, 270/275)
- Drain models after usage, including blood reservoir bags in Chester models.
- Flush all tubing completely before storing for extended periods.
- Use saline or isopropyl alcohol to flush tubing.
- Air dry completely for a day or two prior to storage.
And for an even more immersive experience…
Join VATA President Andrew Call in a step-by-step video tutorial featuring guest appearances from Chester, Seymour, and some other beloved products!
Watch the Video: Care and Cleaning Tutorial
If you have additional questions or need further assistance, please don’t hesitate to reach out!